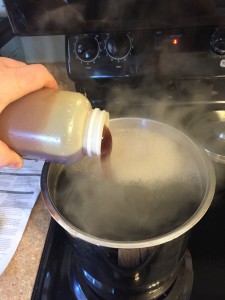
So it's here again! BREW DAY. That glorious few hours where I get to drink beer while making beer. There's really something chicken ad egg about the whole thing. Which came first? Beer or beer? But I digress for now. As this is still somewhat of the beginning to my brewing adventures, I've been starting with some small batch 1-gallon kits to get a feel for where I'm headed next. Ideally I'll be migrating onto some 5-10 gallon batches over the next year or so, getting some automation involved, and preparing a sweet taproom setup.
So with all of that out of the way, let's look at the most recent brew day where I put together a Black IPA. I used the Northern Brewer Small Batch Black IPA kit for this round and this was immensely better than getting started with the all-grain method that I started with during my first Beer Brewing Adventures.
So let's start with the ingredients right out of the box. Fortunately they provide a pretty robust kit and here's what we have:
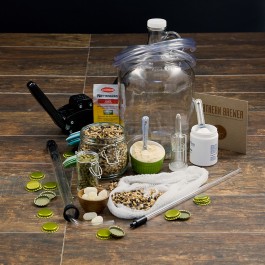 Black IPA Ingredients
Steeping grains and mesh bag
Gold malt extract syrup
7 grams Centennial hops
3.5 grams Chinook hops
3.5 grams Centennial hops
3.5 grams Cascade hops
7 grams Centennial hops
7 grams Cascade hops
5 oz Priming Sugar
Safale US-05 brewer’s yeast
Step 0: Sanitize the $#@! Out of Your Equipment
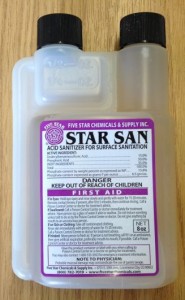 Let me just start by saying: Sanitize above all else. Clean hands, equipment, surfaces, mind-set == great beer. This is the absolutely first and foremost thing you need to get in your head. If you don't like to clean, maybe this sport isn't for you.
Personally, I use Star San as it's a great wash that you don't need to rinse out. You only need an ounce for 5 gallons of water so you can really get a lot of use out of this stuff. It's worth your time to invest in good cleaning equipment. Trust me, if you don't you'll end up with awful (or even dangerous) beer!
So remember: Sanitize sanitize sanitize! You'll be so glad you did and your beer will be so much better for it. So go forth my minions and clean like your beer depends on it. Because it does.
Step 1: Brewing the Wort
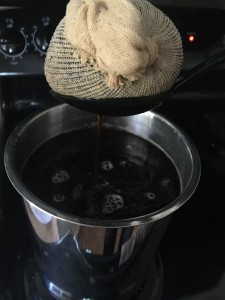 First, you'll want some decent quality water (I use spring water, but if your tap tastes good, use that) Really you just want decent tasting water so none of that "hey my faucet spits out rust so I'll use that" unless you want stanky gross beer. You'll need to put this water in a kettle, and I personally have been using a 6 quart kettle (but honestly, I'll recommend you use a 2 gallon or 8 quart kettle) to brew my wort.
You want to put about 1.25 gallons (20 cups) of water in the kettle and start to bring it to a boil. This will take a little time, but while the kettle is heating up, you'll want to go ahead and steep your grains in the water. Essentially, dump the grains in the mesh bag, and tie it off. I also grabbed a slotted spoon in order to manage the bag of grain. Think of this as making tea with barley malt—steep for approximately 10 minutes as the water heats, then remove the grain and discard. This will the add desired color, flavor, aroma, and body to the finished beer.
Do this for about 10-15 minutes as the water is heating, but do it early, and definitely don't do it as the water comes close to a boil! That just doesn't end up well. Once you're done, discard the grains, or do what my wife over at FoodTaylorMade.com does and use the grains to make bread.
Step 2: Boiling the Wort
The next step here is that once your wort comes to a solid rolling boil, start the timer at 45 minutes to boil the wort. You'll need to follow this exact addition schedule:
0 minutes in: Add Gold Malt Extract and 7g of Centennial hops
30 minutes in: Add 3.5g of Chinook hops
35 minutes in: Add 3.5g of Centennial hops
40 minutes in: Add 3.5g of Cascade hops
45 minutes in: Turn off heat (probably remove from burner), add remaining 7g of Centennial and 7g Cascade hops. Make sure you then mix in (with a sanitized spoon) the 5oz of priming sugar after the boil has stopped.
Next you'll want to get ready to cool this beast down as quickly as possible.
Step 3: Chilling the Wort
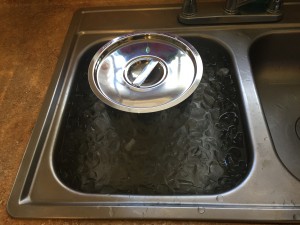 Ideally you'll want to chill your wort as quickly as possible. Now, there are a number of ways you can do this, but to be quite honest, if you're going on the shoestring budget, the way to do this is in a sink full of ice and water. I use between 10lbs and 20lbs of ice and fill the sink with water to chill everything. You may want to consider getting a pot sized such that the pot is not taller than your sink (I have this issue and it sucks) because you want the outside surface of the pot to be as covered in ice-water as possible to maximize heat transfer out to the ice-water.
Stirring the ice around couldn't hurt either. This will help take the heat away from the kettle and cool it quicker. You'll want to do this until the kettle is cool (but not cold!) to the touch. 60-70 degrees is ideal as this is where our yeast will be happy.
Step 4: Transferring the Wort to the Fermentor
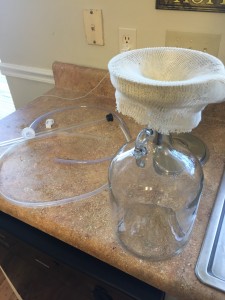 You're now going to transfer your wort to the fermentor for... well... fermenting! Make sure you've done Step 0 and sanitized your gear. You're really really going to regret it if you don't. Contamination can ruin your beer and make all your hard work pretty worthless. So, as you can see in the setup to the left, I've got my fermentor, a stainless steel funnel, and I want to pre-remove some of the sediment from the beer upfront so I washed (and sanitized!) the mesh bag we used earlier.
As you can see on the left, there's an auto siphon (this is also necessary as I used a regular siphon ONCE before I decided that was terrible) that you can use to easily siphon the beer from the kettle to fermentor. Make sure you start at the top and gradually go down trying not to disturb your sediment at the bottom. The filter should catch most of what gets through, but likely you'll end up with a little either way.
Transfer a gallon (maybe a tad more) into your fermenter. Dump HALF and only half of the yeast into the fermentor. Discard the other half or use it to make some tasty bread with the grains from before. Next, place the cap (with the hole) on top, cover with a clean finger, and give the fermentor a healthy shake. Once you've done this, put the tube in. Then, fill a small glass with water and a drop of Star San (to keep the nasties out) and put the other end of the tube in the glass (make sure it stays there) to ensure we can let out CO2, but not let any contamination in.
Step 5: The long wait!
Next comes the extra long awful wait. You'll want to put your fermentor setup in a cool (68-70 degree) dark place (light isn't healthy for your beer) and wait. You'll want to wait about 2-3 weeks or until the ferment is done. The first 24-48 hours, fermentation begins, and then there's a lot of foam, CO2, etc. Fermentation will stop (or immensely slow down) in those 2-3 weeks. I'll be doing a second ferment to clean up the beer for this round, so stay tuned for my next post.
For now... I'll wait impatiently for my tasty tasty beer...
